Part 3: Print My Dashboard to PDF or Png and Email
Continuing with Tableau Server automation, in this section, I shall demonstrate how to build a a method to print your dashboard to pdf and then send to a group of recipients.
The following assumptions have been made:
- You have deployed Tabcmd: Instructions here
- You have an instance of SQL Server installed (minimum Developer Edition) to the server and have deployed a copy of SSIS to your local system: Installing SSIS
- You have a directory in the root of your Tabcmd directory where you can save and execute bat files: Instructions
You can print to png using the same command, both outputs shall be scalable. Usage is generally:
- png for single pages
- pdf for single or multi-page documents
Tableau server already has a print to pdf/png and email function, however, users can often find this quite limiting in what options can be selected; furthermore, users are limited to a simple 'vanilla' output with no control offered as to exactly what to send.
Timings are also a consideration as well, with Tableau server, just like refreshes, these are rigidly set; Tableau has a basic configuration that users can define whether a report is sent, so if the workbook is in the process of refreshing, the report can be configured to not be sent, but unless you set another print for later, no report shall be sent that day; but if everything is ok, then a report shall be sent each time - also not great.
This method is just as easily attached to a complete etl refresh; this is actually covered in more detail on the full build here :Part 4: A Data and workbook refresh: complete build (20 minute read) - On a Tableau Quest... - Confluence (atlassian.net). Though for this page, I'll be just looking at the print to pdf and send though with a slight twist, as here we'll use some parameters to control the dashboard before printing. These controls are just as easily added to any build.
The Build
Step 1: Dashboard
Lets build a dashboard, using Superstore Sales, something simple then:
- Create a regional parameter, call it p_Region, set it up as string and keep it empty
- Create a calculation call it f_Region and set the calc to: Region = p_Region or p_Region = ''
So if the Region matches the value in p_Region, then filter to that unless the p_Region is empty in which case, show everything - Drag f_Region onto the filter of your sheet and select True
- Ensure f_Region is set for all the sheets on the dashboard that you want to filter to
- And now for the title set it to: "Superstore performance for " p_Region " region"
- Now test the function:
- Materialise the p_Region onto the dashboard and populate to "East" - without the quotes. All being well, the dashboard should have filtered to East, and the title should also have updated
- Now clear the p_Region parameter and remove from the dashboard.
Now save the workbook as a packaged workbook call it Superstore.twbx and upload your workbook to your server, and take a note of workbook and sheet name as given by the server on upload, mine is "superstore/Dashboard1".
Step 2: Script
As with everything in tabcmd, here, we shall create a script to instruct tabcmd on what to build.
Depending on how far you want / need to go, you can get quite creative here; some previous examples of my work include using sql on the data side to determine whether a data-quality report needs to be sent; or in the case of an A/B or MVT test dashboard, using sql to determine which experiments have ran their course, and are ready to be examined, grabbing the experiment codes and version numbers, then building on the fly a script to be executed in just a moments time.
For our script, we shall be pulling down two pages, one at the highest grain, the second filtered to South, both as png ready for sending:
The complete script shall login to the server using your credentials, create a high-level png and then a second png filtered to the Central region, saving both to the prints folder ready for sending, before then logging-off. Unless you intend on running more commands in the same script - these scripts can be as long as you need; but it is important to kill your session once you have finished, even if you shall be executing more commands from another script in just a moment.
Now save the script as superstore_daily.bat in your tabcmd scripts folder
Step 3: The ETL
I shall be using part of the demo from Part 4 here:
Open SQL Server Integration Services in MS Visual Studio, create a new project, give it a name and press OK to begin the build, this is covered here: Programmatic Workbook Refresh (10 Minute Read) - On a Tableau Quest... - Confluence (atlassian.net) in Step 2
- Drag an Execute Process Task onto the canvas: this shall execute the batch file to export the two pages as png to your prints "C:\tabcmd\prints" folder.
- Name: Print daily pages
- On the Process page
- Executable: C:\tabcmd\scripts\company_kpi_daily_print.bat
- WindowStyle: Minimized
- Press OK
- Now drag a Send MailTask object onto the canvas: this will send the email to your recipients. You can use SSIS to create detailed messages containing any error codes you have recorded based on your logging, but for this example, we'll stick with hard-coding the fields
- Name: Send the summary page to the DL - you don't need a distribution list here, though it is more usual within a business to maintain them
- Onto the Mail page
- SmtpConnection: You will need to speak to your IT team as regards these details
- From: You
- To: Recipients and/or distribution list
- Cc, BCc, Subject: Populate with your requirements
- MessageSource: <Message Body>
- Attachments: Navigate to the prints produced by Tableau Server (superstore_high.png; superstore_central.png)
- Press OK
- Connect the Print workbook summary page to the Send the summary page to the DL
Step 4: Deployment
Now we have created the print-to-pdf/png and the email out, the final step is to deploy. Again, I use SQL Server for this; if you don't have access to the server, the Developer Edition is free both for personal and commercial use, but is severely throttled on performance: not too great for database servicing, but more than enough power for etl work like this.
The following steps can also be found from Step 2 of Part 2: A Programmatic Workbook Refresh (10 Minute Read) - On a Tableau Quest... - Confluence (atlassian.net)
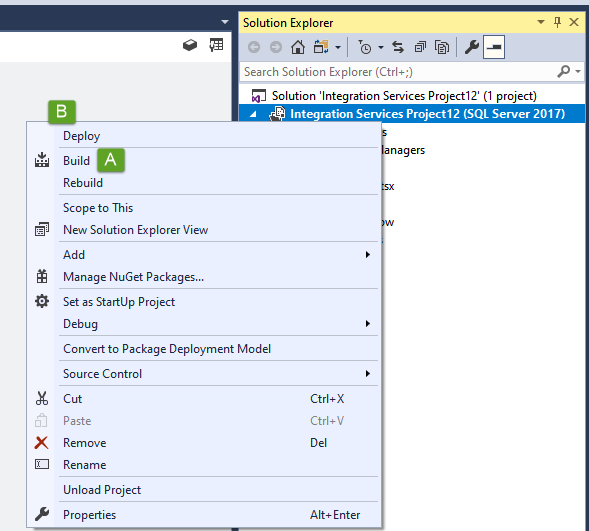
- From the Solution Explorer panel to the right - this might need to be expanded, right mouse the project and then
First select Build to build the project config, this can take some time depending on the project size, but for this project, the build should be immediate with information included in the Output window:
- Back onto the Solution Explorer, now its time to Deploy
- Press Next on the initial Deployment Wizard screen, the Source shall be skipped as it is this project you are deploying, though you can always go back to the Source selection from the Destination page
- Insert your Server name
- Complete your credentials to login to the server
- Path - this is the path to you SSISDB catalogue, hit browse to open the catalogue
- Ensure your catalogue is selected
- Then create a new folder for this project
- Followed by OK
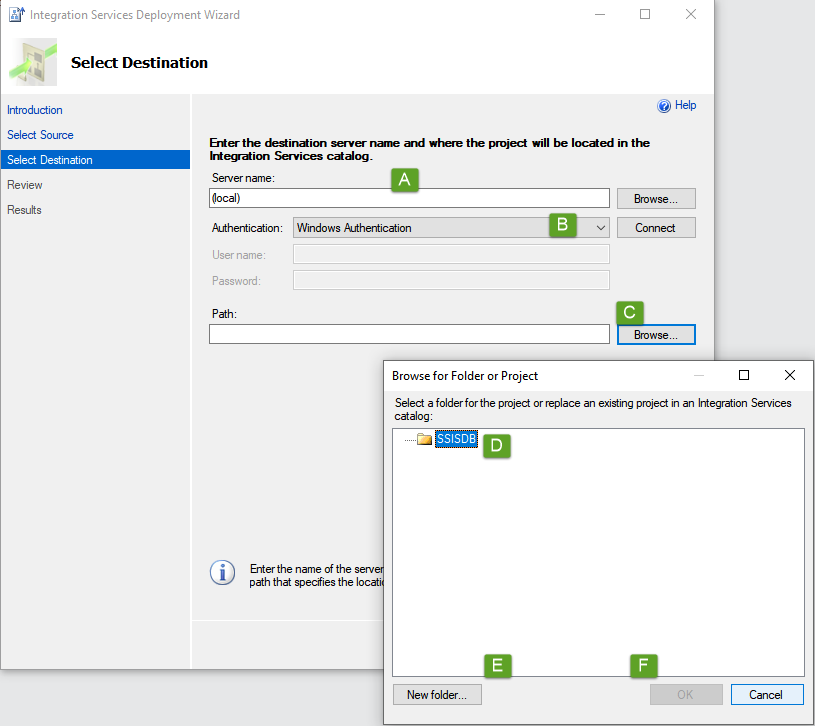
- The path to your new folder shall now be in the Path field, press Next to be taken to the review page
- All being well, press deploy, once the project has been deployed, Close the deployment window
Step 5: Scheduling
Over to SQL Server Management Studio, refreshing the Integration Services Catalogs will show you your newly deployed project; you won't need to do anything more here but if you were using sql parameters (not the same as Tableau parameters), this is where you can set them up.
Expanding the SQL Server Agent, this is where we shall create the job(s):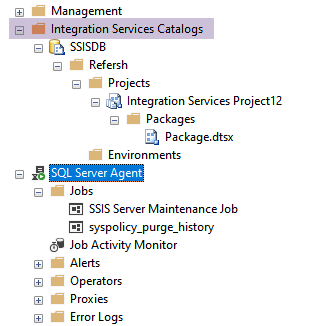
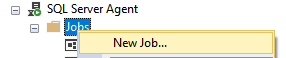
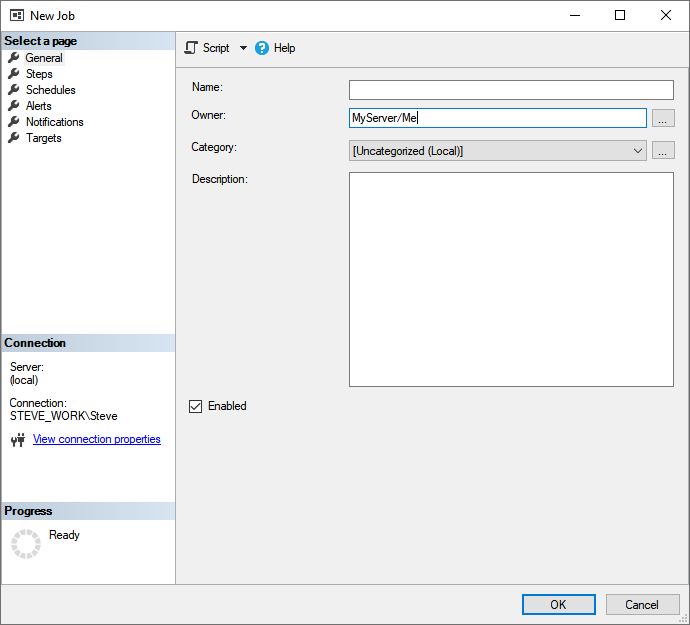
- Right mouse Jobs and select New Job... from the context menu
- Complete the basic details on the General page before selecting Steps
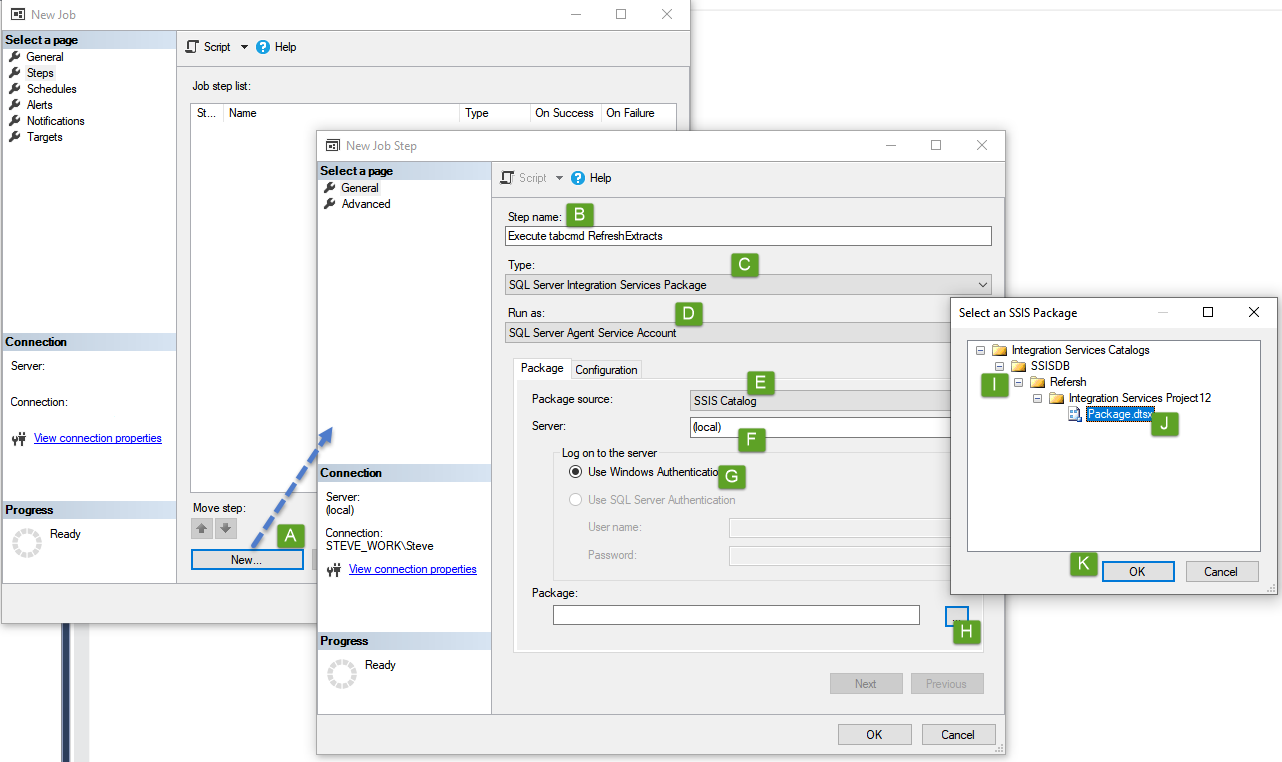
- From the Steps page:
- Press New... to open the new instruction dialogue
- Give the step a name
- From the drop-down, select SQL Server Integration Services Package
- Run As will automatically set SQL Server Agent Service Account
- Package Source will automatically default to SSIS Catalog
- Set your server here - this allows us to execute packages that have been deployed to other servers
- Set your logon credentials
- Press the ellipses at the end of the Package command box to expand the SSISDB of the selected server
- Expand the catalogue to find your project folder, then project, and lastly, the package
- Select the package to highlight it and press OK to add the path to the package to the Package command box
The Advanced page of the New Step dialogue box provides more configuration surrounding how to handle timeouts, but also what to do next; as this is a single-step demo, we can avoid this page. Press OK to add the step
- Finally, from the Schedules page, press New... to open the scheduling window, define your schedule here, pressing OK to add, followed by OK on the scheduling page to create the job and close the dialogue
Now that you've created your job, it shall run to your defined schedule, which can be easily modified at any time, but, you can also manually initiate the job simply by right mouse selecting the job from the Jobs directory, before then selecting Start Job at Step...